Experimental Mark-Making with Lino
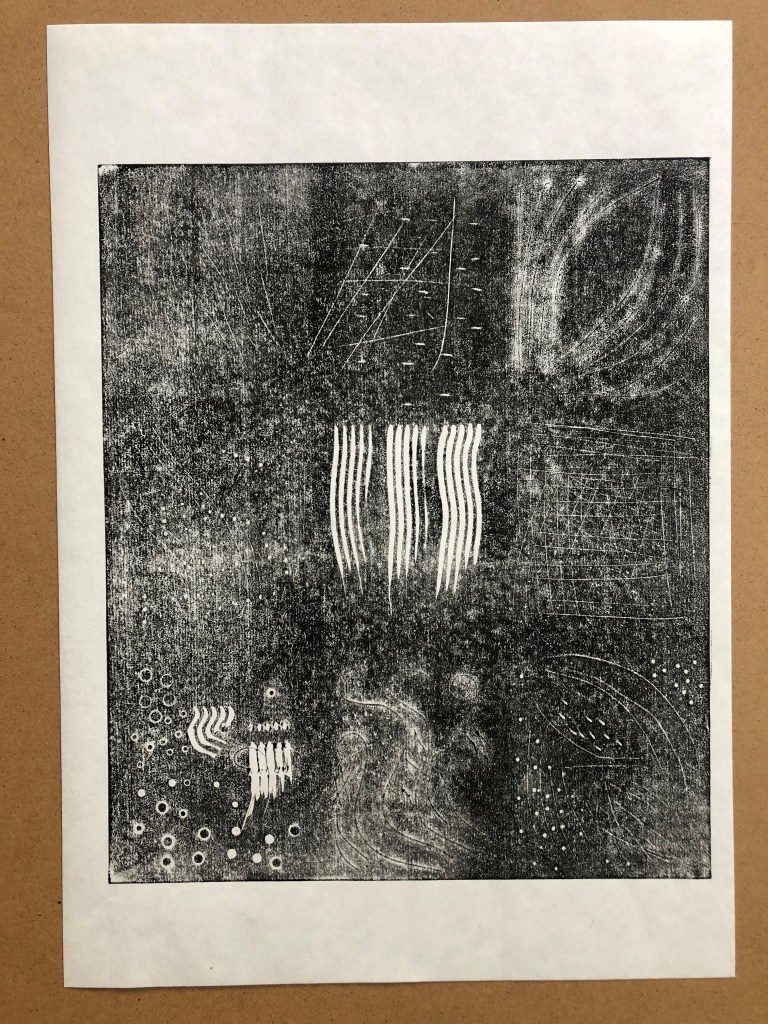
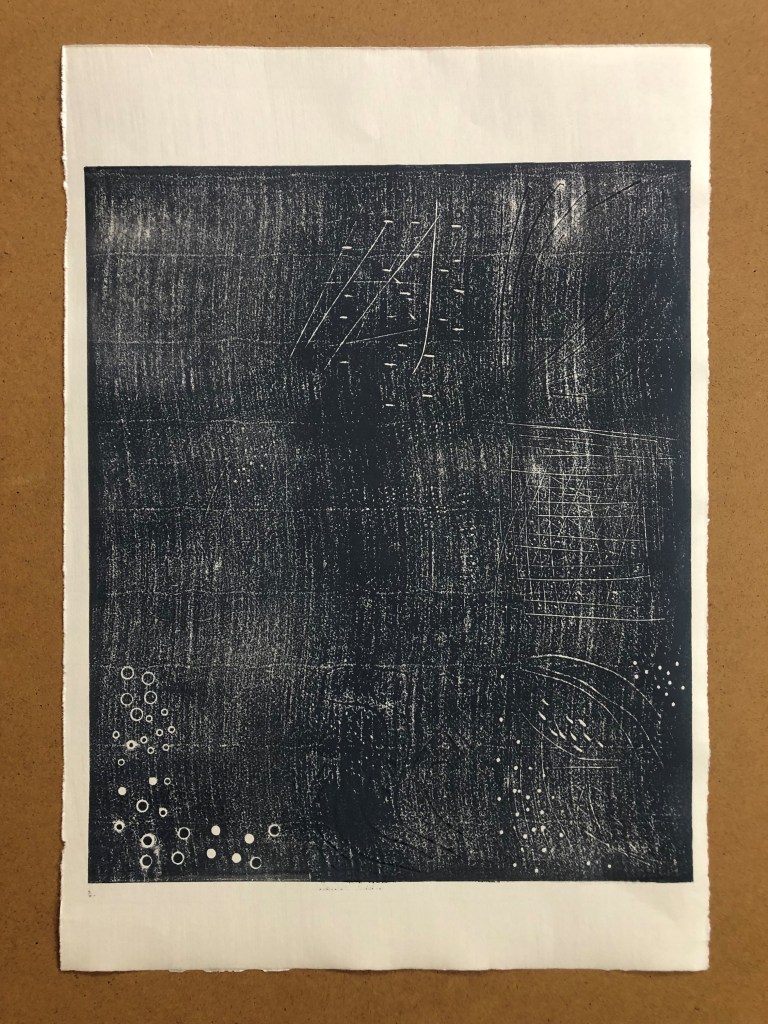
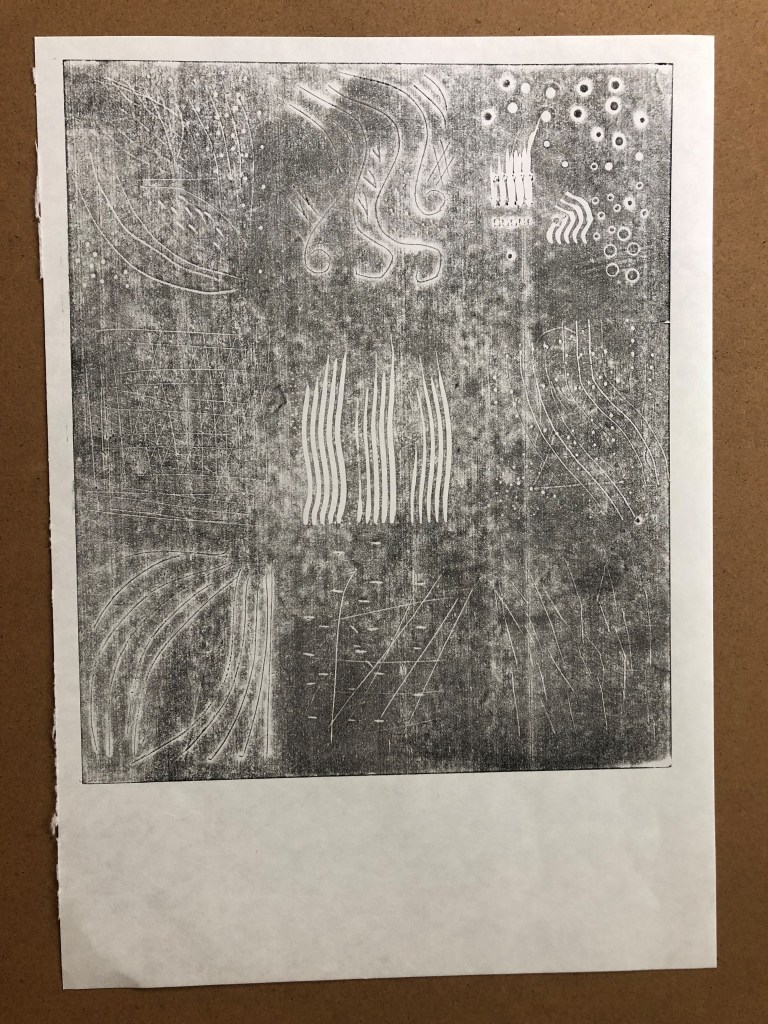
Hopefully, there are discernible squares marked out on this Lino plate. They were numbered 1-9 reading top down, left to right. The tools used to cut into, or at least to mark the the surface of the lino, are as follows.
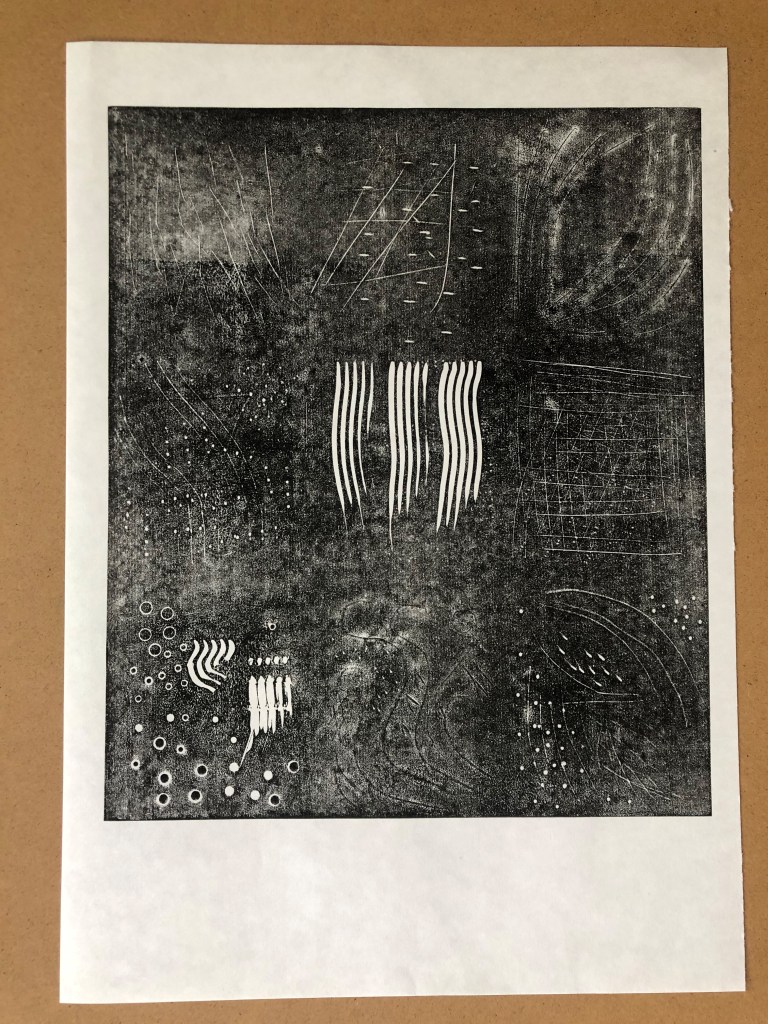
- Steel intaglio tool, double ended. I used both ends of this tool. I pressed both the end point and the side curve into the lino. I found that this created strong marks in the lino which in turn printed clearly lines and dots.
- Exacto knife. This cut very fine lines, as perhaps one might expect from a sharp knife. The deeper the cut the more unwieldy this tool became so that my attempts at cutting curves into the surface of the lino became angular in nature. Post print these registered as dark lines instead of white as the cut marks simply filled with ink.
- Hole punch and eylet setter tools. These two tools were limited in their reach beyond the edge of the lino. These could be used effectively as border tools perhaps. Maybe for the centre of a flower or a jewel? Post print these printed as clear and perfect circles or little eclipses (sic)
- Tweezers. I wasn’t expecting a great deal from these. They make marks of parallel lines and indents by pressing the tips into the lino. Post print these made clear lines as part of the print.
- “Thing“. My partner provided this item. I suspect it’s a drill bit of some kind. It’s a bit like a cylindrical mace. I was unconvinced that anything would show up in the final print, as I simply rolled this item on its side along the lino. Post print it did however just show up as a uniform series of white dots.
- Pencil/pen. These were good for drawing onto the lino. When it came to printing they barely showed up at all. Using a biro I drew a simple figure which was not clear on any of the prints.
- Hacksaw blade. This was satisfying to play with, making obvious score marks in the very top of the lino surface. I felt confident that the print would show these marks clearly, however, they were not as obvious as all that. They were ink-filled lines, so black on black.
- Bulldog clip. Parallel lines like the tweezers – bit deeper. I turned the clip onto its edge and scored lines that show clearly in the lino. I then made dents with the corners of the bulldog clips. Post print these were clear white lines and dents in the print.
- Sandpaper. This made nice highlighted areas on the lino but did not show up whatsoever on the print. I then used the edge of a Philips screwdriver to make bark-like impressions but these showed up in the final print as mere lines.

At first I suspected this exercise to be a waste of time, effort, resources and of my patience and personal safety in using blunt tools where well-maintained tools are prerequisite.
If planning to do any kind of lino cutting, you can’t really go too wrong with a set of decent lino cutting tools. Rather than attempting to reinvent the wheel using a fork or a knife, for example, what’s wrong with simply investing in a good Pfeil set?
However, I persevered. I tried stabbing the lino with a fork and dragging a Philips screwdriver along the surface of the lino. This did not change my view, until I tried to cut using a zester.
I made several marks using this tool from my partner’s kitchen. As well as this, I used a standalone hole punch which, by simply pressing the tip into the lino, cuts satisfyingly perfect holes every time, and wherever you wished to place them.
I used Somerset White 300gsm paper, Hosho paper, and Zerkall 120gsm for this project. I have not varied the ink colour particularly. I was attempting to gain a clear representation of the plate by varying the amount of ink I applied rather than varying the colour.
Strangely, the best representation of the lino plate in print form has been by using the lightest touch with black ink. Each of the cuts in this instance are clearly visible on the lightly inked print. I intend submitting one other pre-zester print just for completion.